How to Set Up Wireless Communication Between Arduino and Bluetooth Modules

In a world driven by technology, the convenience of wireless communication has become a staple in both professional and DIY electronics projects. Setting up wireless communication between an Arduino and a Bluetooth module opens the door to exciting applications like home automation, robotics, and smart devices. Whether you're a seasoned hobbyist or a beginner, this guide will walk you through the process step by step.
Why Use Bluetooth for Arduino Projects?
Bluetooth modules are compact, affordable, and perfect for short-range communication. They allow you to control devices remotely, eliminating the clutter of wires. Whether you're building a smart car, automating your home, or designing a wearable device, Bluetooth simplifies communication between your Arduino and other devices, such as smartphones or PCs.
What You'll Need
Before diving in, gather the following components:
-
Arduino Board: Any model like Uno, Nano, or Mega will work.
-
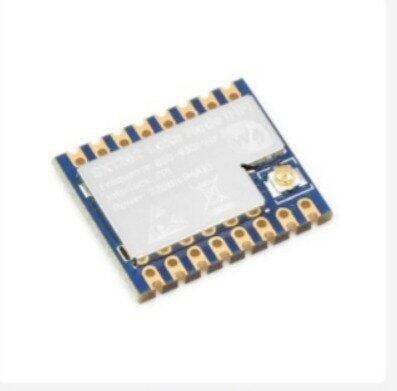
Bluetooth Module: The HC-05 or HC-06 module is a popular choice for beginners.
-
Jumper Wires: To connect the components.
-
Breadboard: Optional but useful for testing connections.
-
Smartphone/PC: To send and receive data.
-
Power Supply: For the Arduino board.
Step 1: Understanding the Bluetooth Module
The HC-05 and HC-06 are the most commonly used Bluetooth modules in DIY electronics. Here’s what you need to know:
-
TX Pin: Transmits data to the Arduino.
-
RX Pin: Receives data from the Arduino.
-
VCC and GND Pins: Provide power to the module.
-
State Pin: Optional, indicates the connection status.
Step 2: Wiring the Bluetooth Module to Arduino
The first step in setting up communication is making the right connections:
-
Connect the Bluetooth Module to Arduino:
-
VCC to 5V: Powers the module.
-
GND to GND: Grounds the module.
-
TX to RX: Connect the TX pin of the module to the RX pin of Arduino.
-
RX to TX: Connect the RX pin of the module to the TX pin of Arduino.
-
Use Voltage Dividers (if necessary):
If your Bluetooth module works on 3.3V logic and your Arduino uses 5V, use a voltage divider on the RX pin to prevent damage.
Step 3: Configuring the Bluetooth Module
Before pairing your module, you might need to configure it using AT commands:
-
Enter AT Mode:
-
Hold the button on the HC-05 while powering the Arduino to enter AT mode.
-
The LED on the module will blink slowly.
-
Configure Settings:
-
Open the Arduino IDE Serial Monitor.
-
Set the baud rate to 9600 and select "Both NL & CR."
Send AT commands to set the module name, PIN, and baud rate:
CopyEdit
AT+NAME=MyBluetooth
AT+PSWD=1234
AT+UART=9600,0,0
Step 4: Uploading Arduino Code
Now, let’s upload the code to the Arduino to enable communication:
cpp
#include <SoftwareSerial.h>
// Define RX and TX pins
SoftwareSerial BTSerial(10, 11); // RX, TX
void setup() {
Serial.begin(9600); // Arduino serial monitor
BTSerial.begin(9600); // Bluetooth module
Serial.println("Bluetooth module ready");
}
void loop() {
// Send data from Bluetooth to Serial Monitor
if (BTSerial.available()) {
char data = BTSerial.read();
Serial.print("Received: ");
Serial.println(data);
}
// Send data from Serial Monitor to Bluetooth
if (Serial.available()) {
char data = Serial.read();
BTSerial.write(data);
Serial.print("Sent: ");
Serial.println(data);
}
}
Code Explanation
-
SoftwareSerial Library: Enables communication with devices on different pins.
-
Data Flow: The code facilitates two-way communication between the Arduino and a paired device.
Step 5: Testing the Setup
-
Pair the Bluetooth Module:
-
On your smartphone or PC, search for Bluetooth devices.
-
Select your module (e.g., "MyBluetooth") and enter the PIN (e.g., 1234).
-
Use a Bluetooth Terminal App:
-
Download a terminal app like "Serial Bluetooth Terminal" on your phone.
-
Send commands to the Arduino and observe the response on the Serial Monitor.
-
Verify Communication:
-
Type a message in the app and watch it appear on the Arduino Serial Monitor.
-
Send data from the Serial Monitor and see it in the app.
Applications of Wireless Communication
Here’s how wireless communication can enhance your projects:
-
Remote Control: Control robots, drones, or appliances with your smartphone.
-
Data Logging: Collect and transmit sensor data wirelessly.
-
IoT Applications: Connect your Arduino to an IoT ecosystem for smart home automation.
Troubleshooting Tips
-
LED Blinks Fast?
This means the module isn’t paired. Recheck your connections and the pairing process. -
No Data Received?
Ensure the baud rate in the code matches the module’s settings. -
Error While Uploading Code?
Disconnect the RX and TX pins during the code upload.
Adding Value with ThinkRobotics
Looking for reliable components to start your wireless communication journey? ThinkRobotics offers a wide range of Bluetooth modules and Arduino boards to suit your needs. With high-quality products and a focus on DIY electronics, ThinkRobotics is your go-to destination for all your project requirements.
Conclusion
Wireless communication between an Arduino and a Bluetooth module opens up endless possibilities for DIY electronics enthusiasts. By following this guide, you’ll not only set up communication but also gain the skills to enhance your projects. Whether you’re building smart gadgets or learning about IoT, this knowledge will serve you well.
Remember, the key to successful projects lies in practice and patience. With the right tools, like those from ThinkRobotics, and a clear understanding of the process, you’ll be crafting innovative solutions in no time. Happy tinkering!
Frequently Asked Questions
1. Can I use a Bluetooth module to control multiple devices?
Yes, but only one connection is active at a time. Use advanced configurations like mesh networks for multiple devices.
2. What baud rate should I use for Bluetooth modules?
Most Bluetooth modules work well at a default baud rate of 9600. You can adjust it using AT commands if needed.
3. Why is my Bluetooth module not entering AT mode?
Ensure you press and hold the module's button while powering it on to enter AT mode. Check the LED behavior for confirmation.
4. Can I use Bluetooth modules for IoT projects?
Yes, Bluetooth modules can connect devices in an IoT setup for short-range wireless communication.
5. What are some common applications of Bluetooth in DIY electronics?
Common uses include home automation, robot control, sensor data transmission, and building smart devices.