One problem with using a typical LCD display is that you give up a lot of GPIO pins to talk to the LCD. Four pins are used to send data, two pins are used for write and clock signals, and another pin or three are used for the backlight for a total of ~6-9 total pins!
With an integrated MCP23017 16-bit IO port expander you can add a full display capability to your project with only 2 pins of the I2C port.
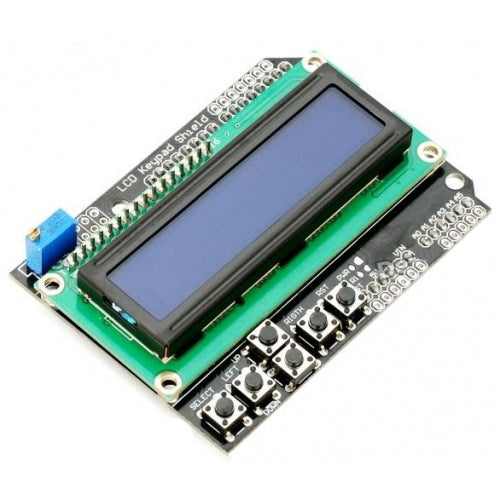
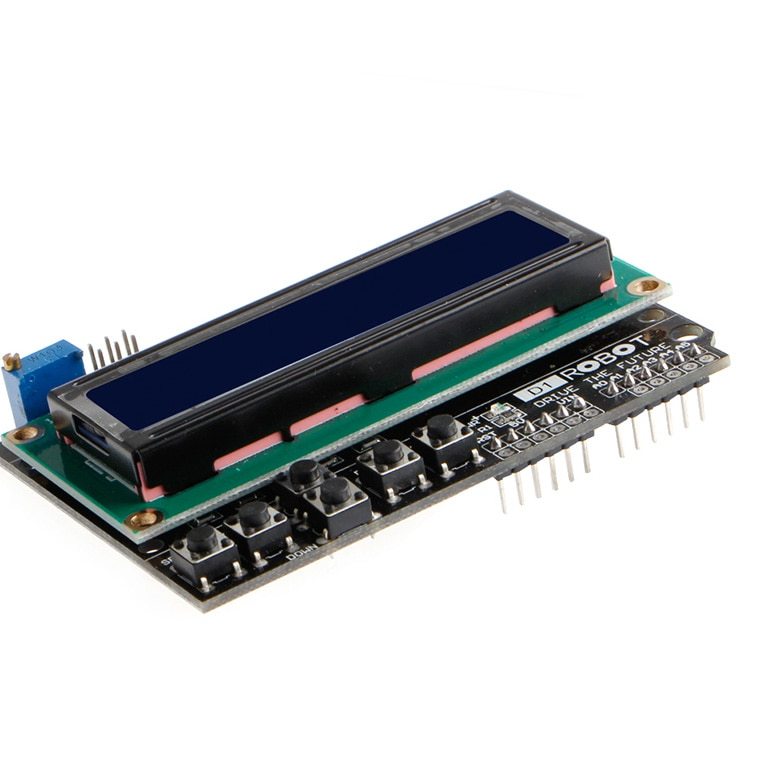
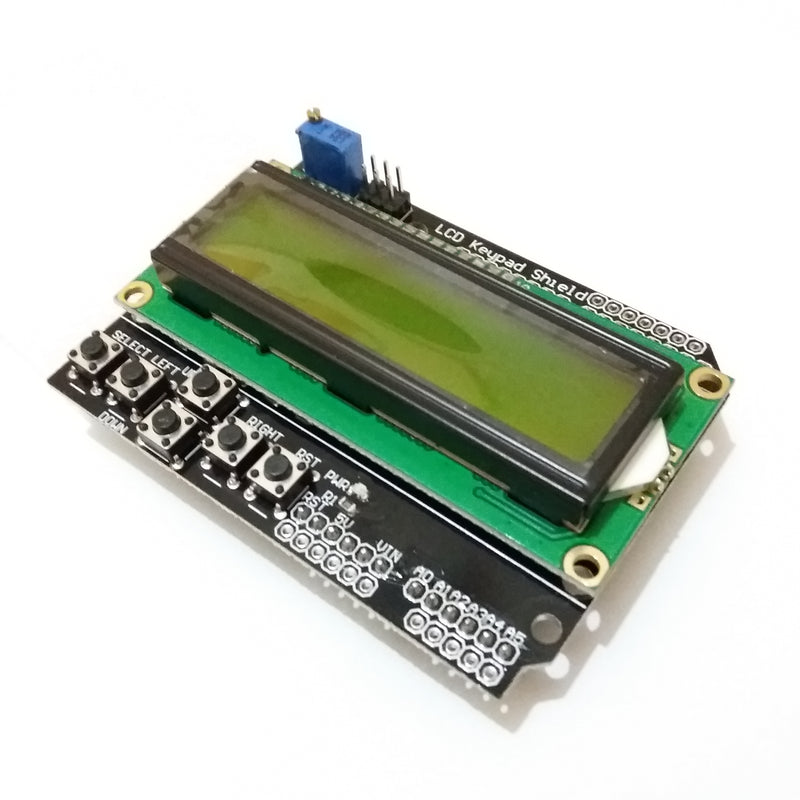
The 16×2 translates of a display 16 characters per line in 2 such lines. In this LCD each character is displayed in a 5 X 7 pixel matrix.
Package Includes: Brightness adjustable 16X2 LCD display with MCP23017 module and 5 button keypad
I'm particularly impressed with how carefully the header pins are packed for the RP2350-PiZero, they arrived in perfect condition without any bent pins, which has been a persistent issue with other competitors. This attention to packaging detail really stands out.
I also received the latest A4 revision of the RP2350, which shows you maintain current inventory, that's really valuable for customers who want the most up to date components.
The delivery was quick and hassle free throughout. I'll definitely be recommending you to others!
App feedback: The discounts offered through the app are a nice bonus, but the component search function could be improved to match the ease of use on the website version. The rest of the app functions work well.
{"id":1621377515592,"title":"1602 LCD Display Shield for Arduino with Push Buttons \u0026 Brightness Control","handle":"brightness-adjustable-16x02-lcd-display-module-i2c","description":"\u003cp\u003e\u003cspan\u003eOne problem with using a typical LCD display is that you give up a lot of GPIO pins to talk to the LCD. Four pins are used to send data, two pins are used for write and clock signals, and another pin or three are used for the backlight for a total of ~6-9 total pins!\u003c\/span\u003e\u003c\/p\u003e\n\u003cp\u003e\u003cspan\u003eWith an integrated MCP23017 16-bit IO port expander you can add a full display capability to your project with only 2 pins of the I2C port.\u003c\/span\u003e\u003c\/p\u003e\n\u003cp\u003e\u003cspan\u003eThe 16×2 translates of a display 16 characters per line in 2 such lines. In this LCD each character is displayed in a 5 X 7 pixel matrix.\u003c\/span\u003e\u003c\/p\u003e\n\u003cp\u003e \u003c\/p\u003e\n\u003cp\u003ePackage Includes: Brightness adjustable 16X2 LCD display with MCP23017 module and 5 button keypad\u003c\/p\u003e\n\u003ch5\u003eSpecifications\u003c\/h5\u003e\n\u003cp\u003e\u003cimg src=\"https:\/\/cdn.shopify.com\/s\/files\/1\/0014\/4313\/5560\/files\/lcd-keypad-shield-pinout_cAw8K5UwWe_480x480.jpg?v=1592765384\" alt=\"\"\u003e\u003c\/p\u003e\n\u003ch5\u003eResources\u003c\/h5\u003e\n\u003cp\u003e\u003ca href=\"https:\/\/github.com\/thinkrobotics\/DATASHEET\/tree\/master\/ELECTRONIC_COMPONENTS\/ELC2005\" target=\"_blank\"\u003eDatasheet\u003c\/a\u003e\u003c\/p\u003e\n\u003cp\u003e\u003ca href=\"https:\/\/github.com\/thinkrobotics\/LIBRARIES\/tree\/master\/ELECTRONIC_COMPONENTS\/ELC2005\" target=\"_blank\"\u003eLibrary\u003c\/a\u003e\u003c\/p\u003e\n\u003cp\u003e\u003ca href=\"https:\/\/github.com\/thinkrobotics\/LIBRARIES\/tree\/master\/ELECTRONIC_COMPONENTS\/ELC2005\" target=\"_blank\"\u003eSample Code\u003c\/a\u003e\u003c\/p\u003e\n\u003ch5\u003eTutorial\u003c\/h5\u003e\n\u003ciframe width=\"560\" height=\"315\" src=\"https:\/\/www.youtube.com\/embed\/JDoTn1sLxWQ\" frameborder=\"0\" allow=\"accelerometer; autoplay; encrypted-media; gyroscope; picture-in-picture\" allowfullscreen=\"\"\u003e\u003c\/iframe\u003e \u003ciframe width=\"560\" height=\"315\" src=\"https:\/\/www.youtube.com\/embed\/PNeiXZ6zr3k\" frameborder=\"0\" allow=\"accelerometer; autoplay; encrypted-media; gyroscope; picture-in-picture\" allowfullscreen=\"\"\u003e\u003c\/iframe\u003e\n\u003cp\u003e \u003c\/p\u003e","published_at":"2022-12-06T11:26:26+05:30","created_at":"2019-02-05T12:32:09+05:30","vendor":"ThinkRobotics","type":"Display","tags":["1602","16X02","16X2","16x2 LCD","DISP1","Display","Display Module","ELC2","I2C LCD","LCD","LCD Display","LCD Module","LCD-MOD","push button","ZOHO UPDATED"],"price":21999,"price_min":21999,"price_max":21999,"available":true,"price_varies":false,"compare_at_price":0,"compare_at_price_min":0,"compare_at_price_max":55000,"compare_at_price_varies":true,"variants":[{"id":39508037926998,"title":"Blue","option1":"Blue","option2":null,"option3":null,"sku":"ELC2005BL","requires_shipping":true,"taxable":true,"featured_image":null,"available":true,"name":"1602 LCD Display Shield for Arduino with Push Buttons \u0026 Brightness Control - Blue","public_title":"Blue","options":["Blue"],"price":21999,"weight":126,"compare_at_price":0,"inventory_management":"shopify","barcode":"ELC2005BL","requires_selling_plan":false,"selling_plan_allocations":[]},{"id":39508037959766,"title":"Yellow","option1":"Yellow","option2":null,"option3":null,"sku":"ELC2005Y","requires_shipping":true,"taxable":true,"featured_image":null,"available":false,"name":"1602 LCD Display Shield for Arduino with Push Buttons \u0026 Brightness Control - Yellow","public_title":"Yellow","options":["Yellow"],"price":21999,"weight":126,"compare_at_price":55000,"inventory_management":"shopify","barcode":"ELC2005Y","requires_selling_plan":false,"selling_plan_allocations":[]}],"images":["\/\/thinkrobotics.com\/cdn\/shop\/products\/16x2-LCD-Keypad-Shield-LCD1602-Module-Display-For-Arduino-LCD-Shield-UNO-MEGA.jpg?v=1577793959","\/\/thinkrobotics.com\/cdn\/shop\/products\/20180221_220838.jpg?v=1577793959","\/\/thinkrobotics.com\/cdn\/shop\/products\/arduino-lcd-keyboard-shield-500x500.jpg?v=1577793959"],"featured_image":"\/\/thinkrobotics.com\/cdn\/shop\/products\/16x2-LCD-Keypad-Shield-LCD1602-Module-Display-For-Arduino-LCD-Shield-UNO-MEGA.jpg?v=1577793959","options":["Color"],"media":[{"alt":"1602 LCD Display Shield For Arduino","id":849426972744,"position":1,"preview_image":{"aspect_ratio":0.969,"height":784,"width":760,"src":"\/\/thinkrobotics.com\/cdn\/shop\/products\/16x2-LCD-Keypad-Shield-LCD1602-Module-Display-For-Arduino-LCD-Shield-UNO-MEGA.jpg?v=1577793959"},"aspect_ratio":0.969,"height":784,"media_type":"image","src":"\/\/thinkrobotics.com\/cdn\/shop\/products\/16x2-LCD-Keypad-Shield-LCD1602-Module-Display-For-Arduino-LCD-Shield-UNO-MEGA.jpg?v=1577793959","width":760},{"alt":"1602 LCD Display Shield For Arduino","id":849427333192,"position":2,"preview_image":{"aspect_ratio":1.0,"height":2448,"width":2448,"src":"\/\/thinkrobotics.com\/cdn\/shop\/products\/20180221_220838.jpg?v=1577793959"},"aspect_ratio":1.0,"height":2448,"media_type":"image","src":"\/\/thinkrobotics.com\/cdn\/shop\/products\/20180221_220838.jpg?v=1577793959","width":2448},{"alt":"1602 LCD Display Shield For Arduino","id":849427365960,"position":3,"preview_image":{"aspect_ratio":1.0,"height":500,"width":500,"src":"\/\/thinkrobotics.com\/cdn\/shop\/products\/arduino-lcd-keyboard-shield-500x500.jpg?v=1577793959"},"aspect_ratio":1.0,"height":500,"media_type":"image","src":"\/\/thinkrobotics.com\/cdn\/shop\/products\/arduino-lcd-keyboard-shield-500x500.jpg?v=1577793959","width":500}],"requires_selling_plan":false,"selling_plan_groups":[],"content":"\u003cp\u003e\u003cspan\u003eOne problem with using a typical LCD display is that you give up a lot of GPIO pins to talk to the LCD. Four pins are used to send data, two pins are used for write and clock signals, and another pin or three are used for the backlight for a total of ~6-9 total pins!\u003c\/span\u003e\u003c\/p\u003e\n\u003cp\u003e\u003cspan\u003eWith an integrated MCP23017 16-bit IO port expander you can add a full display capability to your project with only 2 pins of the I2C port.\u003c\/span\u003e\u003c\/p\u003e\n\u003cp\u003e\u003cspan\u003eThe 16×2 translates of a display 16 characters per line in 2 such lines. In this LCD each character is displayed in a 5 X 7 pixel matrix.\u003c\/span\u003e\u003c\/p\u003e\n\u003cp\u003e \u003c\/p\u003e\n\u003cp\u003ePackage Includes: Brightness adjustable 16X2 LCD display with MCP23017 module and 5 button keypad\u003c\/p\u003e\n\u003ch5\u003eSpecifications\u003c\/h5\u003e\n\u003cp\u003e\u003cimg src=\"https:\/\/cdn.shopify.com\/s\/files\/1\/0014\/4313\/5560\/files\/lcd-keypad-shield-pinout_cAw8K5UwWe_480x480.jpg?v=1592765384\" alt=\"\"\u003e\u003c\/p\u003e\n\u003ch5\u003eResources\u003c\/h5\u003e\n\u003cp\u003e\u003ca href=\"https:\/\/github.com\/thinkrobotics\/DATASHEET\/tree\/master\/ELECTRONIC_COMPONENTS\/ELC2005\" target=\"_blank\"\u003eDatasheet\u003c\/a\u003e\u003c\/p\u003e\n\u003cp\u003e\u003ca href=\"https:\/\/github.com\/thinkrobotics\/LIBRARIES\/tree\/master\/ELECTRONIC_COMPONENTS\/ELC2005\" target=\"_blank\"\u003eLibrary\u003c\/a\u003e\u003c\/p\u003e\n\u003cp\u003e\u003ca href=\"https:\/\/github.com\/thinkrobotics\/LIBRARIES\/tree\/master\/ELECTRONIC_COMPONENTS\/ELC2005\" target=\"_blank\"\u003eSample Code\u003c\/a\u003e\u003c\/p\u003e\n\u003ch5\u003eTutorial\u003c\/h5\u003e\n\u003ciframe width=\"560\" height=\"315\" src=\"https:\/\/www.youtube.com\/embed\/JDoTn1sLxWQ\" frameborder=\"0\" allow=\"accelerometer; autoplay; encrypted-media; gyroscope; picture-in-picture\" allowfullscreen=\"\"\u003e\u003c\/iframe\u003e \u003ciframe width=\"560\" height=\"315\" src=\"https:\/\/www.youtube.com\/embed\/PNeiXZ6zr3k\" frameborder=\"0\" allow=\"accelerometer; autoplay; encrypted-media; gyroscope; picture-in-picture\" allowfullscreen=\"\"\u003e\u003c\/iframe\u003e\n\u003cp\u003e \u003c\/p\u003e"}