Learn
Popular posts
-
Post's nameJan 18, 2026
-
Post's nameJan 18, 2026
-
Post's nameJan 18, 2026
Categories
- All topics
- - rapid prototyping
- 100% 3K 2×2 twill carbon fiber fabric
- 3D camera technology
- 3D cameras
- 3D Design for Robotics
- 3D pen art
- 3d print design
- 3d printed products
- 3D printed products for sale
- 3D printer
- 3d printing
- 3D printing components
- 3d printing filament
- 3D Printing for Robotics
- 3D printing machine
- 3D Printing Materials
- 3d printing process
- 3d printing projects
- 3D Printing Robot Parts
- 3D printing technology
- 3K Carbon Fiber Square Tub
- 3K Carbon Fiber Tube
- 433 MHz RF-module communication basics
- 6 Jumpers
- AC motors
- accurate thermal control
- Active RFID tags
- Adapter
- adaptive real-time accelerator
- adding texture and details
- additive manufacturing
- adjust
- Advanced Communication Protocols
- Advanced composites in robotics
- advanced computing projects
- Advanced connectivity options
- advanced data analysis
- Advanced Robotics Sensors
- advanced techniques and materials
- Advanced uses of carbon fibre
- Advances in GPS for IoT
- advantages of carbon fiber sheets
- advantages of smart dustbin using arduino
- affordable
- Affordable Robotics Projects
- Agriculture robots
- AI
- ai and supply chain
- ai and supply chain management
- AI Development Kits
- AI development platform
- AI home automation
- AI in home
- ai in supply cha
- ai in supply chain
- AI in supply chain management
- AI projects on Jetson Nano
- AI smart home
- AI-powered home automation systems
- AI.
- ain drop detection sensor
- Air quality sensors
- analog ph sensor
- anti-clockwise
- anti-static grounding design
- antistatic soldering iron
- Apache configuration file
- application
- application of ir sensor
- application of relay
- application of relays
- Application protocol for IoT
- applications and impact of FDM
- applications of ir sensor
- Applications of Machine Learning in Embedded Systems
- applications of relay
- ARD1
- arduino
- arduino based mini projects
- arduino based project
- arduino based projects
- arduino based projects list
- Arduino boards
- Arduino Cloud
- Arduino Cloud Dashboards
- Arduino Cloud Functions
- Arduino Cloud Variables and Properties
- Arduino Community
- Arduino IDE
- arduino iot projects
- arduino mini projects
- Arduino nano 33 ble sense
- Arduino portenta h7
- arduino project ideas for beginners
- arduino projects for beginners
- arduino projects for beginners Secondary
- arduino projects with code
- arduino rain drop sensor
- Arduino Robotics
- Arduino Sensors
- Arduino Shields
- arduino simple projects
- arduino simple projects aurdino projects
- Arduino Uno
- arduino uno based projects simple iot projects using arduino
- arduino uno project
- arduino uno projects
- arduino uno projects for beginners
- Arduino WiFi modules
- ARM Cortex-A17 processor
- ARM Cortex-A7/RISC-V MCU/NPU/ISP processors
- ARM Cortex-M4
- ARM Cortex-M4 core
- artificial intelligence
- Artificial Intelligence (AI)
- As per the industry standards
- assembly
- Asus Tinker Board
- audio
- audio jack
- aurdino projects
- Auto-ranging multimeter
- automation
- automation anywhere
- automotive design materials
- autonomous flight
- Autonomous Robotics
- Autonomous Robotics Software
- Balanced propeller
- Bandwidth efficiency
- Battery
- Battery Chargers for Robotics
- battery life and performance
- battery management system
- Battery technology
- Battery types and uses
- Beaglebone Black
- beginner AI projects
- Beginner Robotics Kits
- benefits of AI in home automation
- benefits of carbon fibre rods
- benefits of robotics in education
- Benefits of using home automation protocols
- benefits of using OS in home automation
- benefits of using OS in home automation and future of OS in home automation.
- best arduino projects
- Best carbon fiber for DIY
- best carbon fiber for UAV applications and the future of carbon fiber in UAV technology
- Best carbon fibre for DIY
- Best Drone Frames
- Best navigation systems for UAVs
- Best NVMe SSDs 2025
- best OS for home automation
- Best practices for RFID reader usage
- Best protocols for home automatio
- best solar charger
- best solar charger for phone
- BIOS SSD settings
- bipolar stepper motor
- block diagram of smart dustbin using arduino
- Bluetooth 4.2 and BLE
- Bluetooth connectivity
- Boost efficiency
- Boost your return on investmen
- brand experience
- brand identity
- Breadboard
- Brush DC motor
- build drone kit
- build own drone kit
- Building automation
- Building Drones DIY
- Building IoT devices with Raspberry Pi
- built-in RISC-V MCU
- buzzer
- cable
- Camera
- Camera Integration in Robotics
- camera lens
- camera module
- camera module assembly
- camera module design
- camera module price
- camera module testing
- carbon fiber art projects
- Carbon fiber components
- Carbon fiber components for robotics
- carbon fiber drones
- Carbon fiber for industrial applications
- carbon fiber in prototyping
- Carbon fiber integration
- Carbon fiber propellers
- Carbon fiber sheets
- carbon fiber square tube
- carbon fiber tube
- carbon fiber tube connectors
- carbon fiber tube for sale
- carbon fiber tube manufacturers
- carbon fiber tube square
- carbon fiber UAVs
- carbon fibre advantages
- Carbon fibre applications
- carbon fibre automotive parts
- carbon fibre benefits in UAVs
- Carbon fibre components for robotics
- carbon fibre durability
- Carbon fibre electronics enclosures
- Carbon fibre fabric for aerospace
- Carbon fibre fabric properties
- carbon fibre for construction
- carbon fibre for drones
- Carbon fibre for industrial applications
- Carbon fibre for model building
- Carbon fibre in automotive
- Carbon fibre in competitive robotics
- Carbon fibre in construction
- Carbon fibre in engineering
- carbon fibre in green technology
- Carbon fibre in robotics
- Carbon fibre in sports equipment
- carbon fibre in tech innovations
- Carbon fibre rod applications
- Carbon fibre strength and flexibility
- carbon fibre sustainability
- Carbon fibre technology
- Carbon fibre-reinforced polymers
- Challenges of home automation protocols and Future of home automation protocols.
- change
- Choosing a flight controller
- Choosing gears & gear ratios for robots
- Choosing the right home automation protocol
- Choosing the right RFID frequency
- circuit
- circuit diagram of smart dustbin using arduino
- class
- classification of lora module
- classification of sensors in iot
- classification of sensors in it
- classroom
- closed-loop stepper motor
- Cloud Fundamentals
- commands
- Commercial VPN services
- common 3d printing
- communication protocol IOT
- Communication Protocols
- Communication Protocols in IoT
- Compact and versatile
- compact design
- Comparing carbon fiber grades
- Comparing carbon fibre grades
- comparison of flight controllers for drones
- Competitive edge
- components
- comprehensive protection features
- Comprehensive software ecosystem
- Connecting Robots to the Internet
- consulting experts
- Contactless RFID cards
- Control board
- controls
- Cost-effective
- cost-effective 3D printing materials
- Cost-effective manufacturing
- CPU PID temperature control
- Crafting with carbon fiber
- creative uses of carbon fiber.
- Cricut Joy
- current
- Custom carbon fibre structures
- custom designs
- Custom Robotics Parts
- Custom Robots Raspberry Pi
- custom vinyl decals
- custom-branded packaging
- custom-made items
- customizable parameters
- Cutting Needs and Budget
- Daly Smart LiFePo4 BMS with Bluetooth
- Data collection
- DC
- DC motors
- deep learning models
- degrees of freedom
- depth information
- Depth Sensing
- Depth Sensing Camera Performance
- Depth Sensing Camera Projects
- Depth Sensing Camera Technology
- Depth Sensing Cameras
- desktop
- detect
- detector
- Development board
- Development Breakout Board
- development costs
- Dexterity
- difference between sensors and actuators in iot
- different filament types
- different sizes and resolutions
- different types of flight controllers for UAVs
- Different types of home automation protocols
- different types of sensors in iot
- digital display shows
- Digital Light Processing (DLP)
- digital multimeter
- digital signal processing
- digital temperature calibration
- Digital voltmeter
- Display
- display modules
- DIY
- DIY 3D printer
- DIY Arduino Projects
- DIY carbon fiber projects
- DIY carbon fibre projects
- Diy drone
- DIY Drone Propellers
- DIY home automation project
- DIY Laser Cutter Projects
- DIY projects
- DIY Robotic Arms and Robotics Arms Technology.
- DIY Robotics Projects
- Drone Assembly Guide
- Drone battery
- drone builder kit
- Drone camera
- Drone construction materials
- drone frames
- drone kit
- drone kit diy
- Drone Motors Explained
- Drone navigation systems
- Drone parts
- Drone photography tips for India
- Drone price
- Drone price in India
- drone propeller
- Drone propeller design
- Drone propeller dimensions
- Drone propeller direction
- drone racer kit
- Drones in India
- dual-core microprocessor
- Durable carbon fibre textiles
- Durable composite materials
- durable drone materials
- durable robotics components
- Dynamic DNS service
- Eco-friendly materials
- Edge AI computing
- Edge AI development
- Edge Computing
- EdgeAI
- education in robotics
- educational purposes
- Educational Robot Arms
- Educational Robotics Kits
- Electric motor
- Electric vehicles
- electronic
- electronics
- electronics soldering iron kit
- embedded and edge AI
- Embedded Systems
- Energy density
- Energy Efficient Robotics
- Energy management
- engineer
- engineering
- Engineering projects
- engraving area
- Enhancing RFID accuracy
- enhancing robot performance
- Environmental monitoring
- ESP Modules for Robotics
- Esp32-cam board
- Ethical Hacker Toolkit
- ethical hacker's toolkit
- Ethical Hacking
- ethical hacking projects
- Expanded memory capacity
- experiment with various materials
- explain rain drop sensor
- external hard drive
- Extruder system
- eye blink sensor
- eye blink sensor arduino
- eye blink sensor circuit diagram
- eye blink sensor image
- eye blink sensor image.
- eye blink sensor price
- eye blink sensor project
- eye blink sensor project report
- eye blink sensor with goggles
- eye blink sensor working
- Farm automation system
- Faster prototyping
- fastest NVMe SSD
- FDM 3D printing
- features of lora module
- features of sensors in iot
- features of sensors in iot.
- Feeder system
- Flashing Tool
- flexible framework
- flight controller for drone
- Flight controller integration
- flight controller options
- flight controllers and enables
- flight controllers for agricultural UAVs
- flight controllers for delivery drones
- flight controllers for fixed wing UAVs
- flight controllers for hobby drones
- flight controllers for multirotor UAVs
- flight controllers for racing drones and the benefits of different flight controllers.
- flight controllers for UAVs
- floating-point unit
- four degrees of freedom
- fpv drone kit
- Frequency regulation for RFID
- Frequency selection for RFID tags
- full form of ir sensor
- full form of ldr sensor
- function of ir sensor
- Fused Deposition Modeling (FDM)
- Future applications of carbon fibre.
- future of AI in home automation and how AI improves home automation.
- future of OS in home automation.
- future of robotics in education
- future of robotics materials
- Future of space exploration
- Future trends in GPS and IoT
- game
- gaming SSDs
- Gas detection sensors
- Gas leak detection
- Gas leak detection and Portable gas sensors
- Gen4 NVMe SSDs
- generative ai projects
- Glass fiber reinforced propellers
- global IoT market
- Global positioning advancements
- GPS accuracy improvements
- GPS applications in smart devices
- GPS components
- GPS in autonomous vehicles
- GPS in smart cities
- GPS IoT integration
- GPS receiver types
- GPS satellite technology
- GPS signal processing
- GPS tracking systems
- GPS-enabled devices
- gripper
- HDMI
- HDMI cable
- Head cap nuts
- Heat detection in robots
- Hex nuts
- high brightness and contrast
- high contrast
- High cycle life
- High Quality 3K Twill Roll Wrapped Carbon Fiber Square Tube
- High Torque Stepper Motor
- high-current applications
- high-durability hot air gun
- high-end precision PID temperature stabilization
- High-frequency RFID
- high-performance applications
- High-performance materials
- High-quality nuts
- high-resolution camera
- High-speed peripheral connections
- High-strength carbon fibre
- High-strength materials for sports equipment
- High-strength rods for DIY
- high-temperature resistance
- History of GPS technology
- home automation AI
- home automation OS
- home automation OS comparison
- Home automation protocols
- home automation system
- Home automation with Raspberry Pi
- hot air rework station
- how do 3d cameras work
- how does ir sensor work
- How GPS works
- How home automation protocols work
- how ir sensor works
- How to program Arduino Uno
- how work soldering iron kit
- i2c
- i2c bus communication
- i2c bus devices
- i2c bus protocol
- i2c communication
- i2c communication protocol
- i2c data bus
- i2c meaning
- i2c protocol
- ideal Laser Cutting Machine
- image generation using GAN
- image processing algorithms
- image sensor
- impact of FDM 3D printing
- import
- Importance of navigation systems in UAV applications.
- importance of OS in home automation
- in-holder standby function
- including design considerations
- Induction motor
- industrial automation
- Industrial gas monitoring
- Industrial IoT data logger with Raspberry Pi
- Industrial Robot Arms
- industrial robotics
- Industrial temperature sensors
- industry
- infrared proximity sensor
- infrared sensor
- infrared sensor uses
- infrared sensors
- innovation in the automotive industry
- Innovative applications of multimeters in tech
- innovative materials in engineering
- Innovative uses of carbon fibre
- Integrating RF chips in IoT
- integration
- Integration of GPS with IoT networks
- intelligent balancing
- interfacing
- internet
- Internet of Things
- Internet of Things (IoT)
- Internet of things protocols
- Introduction to TinyML on microcontrollers
- IoT cloud platform
- IOT communication protocols
- IoT Devices for Robotics
- IoT hardware
- IoT location tracking
- IoT projects
- IOT protocols
- IoT Robotics Projects
- IoT weather station with Raspberry Pi
- IoT WiFi modules
- IoT-based security system with Raspberry Pi
- IP for IoT
- ir proximity sensor
- ir range sensor
- ir sensor
- ir sensor applications
- ir sensor full form
- ir sensor function
- ir sensor in iot
- ir sensor is used for
- ir sensor means
- ir sensor principle
- ir sensor range
- ir sensor use
- ir sensor uses
- ir sensor working
- ir sensor working principle
- ir sensors
- Irrigation control sensors
- ithium polymer battery vs lithium ion power bank
- Jetson Nano
- joystick
- jumper wires
- Just-in-time manufacturing
- keyboard
- keypad
- kit for drone
- Laser beam sensor
- Laser Cutter Software
- Laser Cutting
- Laser Cutting Design
- Laser Cutting in Robotics
- Laser Cutting industry
- Laser Cutting Machine
- Laser Cutting Machine in India
- Laser Cutting Materials
- Laser displacement sensor
- Laser distance senso
- Laser distance sensor
- Laser Engraving Machine for Metal
- Laser measurement sensor
- Laser proximity sensor
- Laser scanning sensor
- laser sensor
- laser sensor system
- Laser sensor technology
- Latency
- ldr light sensor
- ldr sensor
- ldr sensor circuit
- ldr sensor diagram
- ldr sensor full form
- ldr sensor price
- ldr sensor use
- ldr sensor working
- Learn how to build an automatic dispenser from scratch
- Learning Robotics at Home
- LED
- li polymer battery vs lithium ion battery
- LiDAR
- LIDAR for Robotics
- LiDAR technology
- lighter controllers
- lightweight drones
- Lightweight fabric for automotive
- lightweight materials for robots
- lightweight materials for vehicles.
- lightweighting UAVs with carbon fiber
- Linear motor
- LiPo
- lithium ion battery vs li polymer battery
- lithium ion battery vs lithium polymer battery
- lithium ion vs lithium polymer battery life
- lithium ion vs lithium polymer battery which is better
- lithium ion vs lithium polymer mobile battery
- lithium polymer battery vs ion
- lithium polymer battery vs li ion battery
- lithium polymer battery vs lithium ion
- Lithium-ion batteries
- Lock nuts
- lora module
- lora module ai
- lora module arduino
- lora module for arduino
- lora module price
- lora module range
- lora radion module
- lora wireless module
- low power consumption
- Low-frequency RFID
- low-power operation
- Luckfox Pico Mini RV1103 Linux Micro Development Board
- luckfox pico rv1103
- Machine learning
- Machine Learning Hardware
- machine learning in supply chain
- Machine Learning Projects
- Maintenance and Technical support
- make own drone kit
- Mapping
- Martian construction
- material compatibility
- Material Jetting technology
- material selection
- MAX7219
- Measuring resistance using a multimeter
- mechanical
- mechanical claw
- media server on Raspberry Pi
- media server softwar
- melted thermoplastic filament
- membranekeypads
- memory protection unit
- Message communication protocols for connected devices in IoT
- micro USB cable
- Micro USB Cable with Adapter
- Microcontroller uart
- mini drone
- Mini drone camera
- Mini multimeter
- mini projects using arduino
- mini soldering iron kit
- MJF 3D printers
- MJF 3D printing
- MLX
- mobile robot
- module
- modulus of elasticity
- monitor
- Monitor with HDMI cable
- motion
- Motion controllers
- Motion detection technology
- Motion sensor applications
- Motion sensor applications and Wireless motion sensors.
- motor
- motors
- mouse
- Mouse and Keyboard
- mproved thermal design
- multi-modal sensing
- multimeter
- Multimeter oscilloscope
- Multimeter uses in modern technology
- Multimeters in computing and IoT devices
- multithreaded performance
- music
- music generation with RNNs
- Navigation
- NEMA 23 motor
- Nominal voltage
- nuts and bolts
- NVIDIA Jetson Nano
- NVIDIA Jetson Nano Developer Kit
- NVIDIA Jetson Projects
- OLED
- open source OS for home automation
- Open-source and customizable
- Open-source ROS framework
- OpenVPN client configuration file
- Optical laser senso
- Optical laser sensor
- paper battery
- Passive RFID tags
- Path Planning for Robots
- Payload capacity
- PCB etching at home: step-by-step
- PCIe 5.0 SSDs
- Person detector
- PETG vs PLA: 3D-printing material guide
- ph level sensor
- ph sensor
- ph sensor arduino
- ph sensor diagram
- ph sensor for water
- ph sensor module
- ph sensor price
- ph sensor with arduino
- ph sensor working
- ph sensor working principle
- Photodiode
- Pi
- Pi Camera Modules
- PIR
- PIR Sensor
- PIR sensors
- Plastic propellers
- popular OS for smart homes
- Portable gas sensors
- potentiometers
- powder handling system
- power
- power and wattage
- power bank solar power charger
- Power efficiency in edge computing
- Power Management in Robotic
- Power supply unit
- powerful PC
- powerful performance
- precise powder handling
- precise thermal control
- Precision agriculture
- Precision Cutting for Robotics
- precision manufacturing
- Predictive maintenance
- preheating-hot air soldering station
- Prices and warranty options
- Primary:
- principle of ir sensor
- Print bed
- Print quality
- process automation robotics
- process robotics automation
- product design
- product development
- product development with carbon fiber
- Professional aerial cinematography
- programming
- Programming Arduino Robots
- Programming Robot arms
- programming techniques.
- project
- project using arduino
- projects
- projects using arduino
- projects with arduino
- promotional items
- Propeller efficiency
- Propeller guards
- Properties of carbon fibre
- Protocol used in IoT
- Protocols used in IoT
- Prototyping materials
- proximity ir sensor
- ps2
- quad-core CPU
- quad-core processor
- Racing and freestyle communities
- racing drone kit
- Radiation resistance
- rain drop detection sensor
- rain drop sensor
- rain drop sensor arduino
- rain drop sensor module
- rain drop sensor price
- rain drop sensor working principle
- rain drop sensorrain drop sensor module
- Rapid Prototyping
- rapid prototyping techniques.
- rapsberrypi
- Raspberry Pi 3 B+
- Raspberry Pi 4
- Raspberry Pi 4 Model B
- Raspberry Pi 5
- Raspberry Pi 5 8gb
- Raspberry Pi 5 India
- Raspberry Pi Accessories
- Raspberry Pi arcade gaming machine
- Raspberry Pi community
- Raspberry Pi Compute Module 4
- Raspberry Pi for beginners in IoT
- Raspberry Pi for Robotics
- Raspberry Pi gaming machine
- Raspberry Pi in IoT
- Raspberry Pi in IoT applications
- Raspberry Pi media server
- Raspberry Pi or Arduino
- Raspberry Pi OS
- raspberry pi pico
- Raspberry Pi Robot
- Raspberry Pi Robotics Projects
- Raspberry Pi Sensors
- Raspberry Pi VPN server
- Raspberry Pi web server
- Raspberry Pi Zero 2 W
- Raspberry Pi Zero 2 W India
- Raspberry Pi Zero 2 W Review
- Raspberry Pi Zero 2 W.
- Raspberry Pi Zero W
- Raspbian Operating System
- raspbian os
- Real-life applications
- Real-time data processing
- real-time decision-making
- Real-time GPS tracking
- real-time monitoring
- Rechargeable Batteries for Robots
- relay application
- relay applications
- relay definition in electronics
- relay in electrical
- relay is used for
- relay sensor
- relay type
- relay types
- relay work
- relay working
- relay working principle
- Retail
- Rework Soldering Station
- RF chip applications
- RF chip design
- RF chip performance and Future of RF chips
- RFID access control
- RFID anti-counterfeiting
- RFID authentication methods
- RFID card applications
- RFID card customization and RFID card usage in public transport
- RFID card encoding
- RFID card readers
- RFID card security
- RFID card security features
- RFID card technology
- RFID card types
- RFID communication protocols
- RFID for asset tracking
- RFID for personal identification
- RFID for secure transactions
- RFID frequency impac
- RFID frequency standards
- RFID frequency tuning
- RFID in healthcare
- RFID in inventory management
- RFID in logistics
- RFID in retail
- RFID interference issues
- RFID interference problems
- RFID IoT applications
- RFID reader compatibility
- RFID Reader Installation
- RFID security solutions
- RFID tag durability
- RFID tag manufacturing
- RFID tag misreads
- RFID tag range and frequency
- RFID tags and sensors
- RFID troubleshooting tips
- RFID-enabled smart devices
- robot
- robot arm
- Robot Battery Life
- Robot Communication Protocols
- Robot India
- Robot Localization Techniques
- Robot Obstacle Avoidance
- Robot Operating System
- Robot Operating Systems
- Robot Programming Tutorial
- robotic arm
- Robotic arms
- robotic process automation example
- robotic process automation software
- robotic process automation tools
- Robotic programming
- robotics
- robotics automation process
- Robotics Batteries
- Robotics Coding Languages
- robotics construction materials
- Robotics Control Systems
- robotics design innovations
- Robotics for Beginners
- Robotics in Agriculture
- robotics in education
- robotics in education articles
- robotics in education conference
- robotics in education pdf
- robotics in education ppt
- Robotics in Healthcare
- robotics in the education
- Robotics Kits for Schools
- Robotics movement sensors
- robotics process automation
- robotics process automation tools
- Robotics projects
- Robotics Prototyping
- Robotics Software
- Robotics Vision Systems
- robots in education examples
- Rockchip RK3288 processor
- Rockchip self-developed 4th generation NPU
- ROS Industrial
- ROS projects
- ROS Robot
- rpa developer
- rpa robotics process automation
- rs232 and UART
- RV1103
- RV1103 Linux
- Sample collection
- SATA cables
- SATA SSD
- Satellite servicing
- Scalability
- School projects
- Screen
- Screws and nuts
- SD Card
- Secondary:
- Secure RFID systems
- Security systems
- Security Testing
- Security.
- Selecting a flight controlle
- Selecting carbon fiber parts
- Selecting carbon fibre parts
- Selective Laser Sintering (SLS)
- sensor
- Sensor Fusion in Robotics
- sensor projects for beginners
- sensor technology
- sensors and actuators in iot
- sensors in iot
- sensors used in iot
- Sensors.
- Serial peripheral interface protocol
- Serial peripheral interface spi
- servo
- servos
- Set Up VPN Using Raspberry Pi
- Setting up an MQTT broker on Raspberry Pi
- Signal
- simple arduino projects
- simple arduino projects with sensors
- single-board computer
- single-board computers
- single-board computing
- six degrees of freedom
- small businesses
- small form factor
- Smaller
- Smart agriculture technology
- Smart digital multimeter
- smart dustbin project using arduino
- smart dustbin using arduino
- smart dustbin using arduino circuit diagram
- smart dustbin using arduino code
- smart dustbin using arduino project report pdf
- Smart farming solutions
- Smart home protocols
- smart hub
- Smart inventory management
- smart lights
- smart locks
- Smart multimeter
- smart plugs and switches
- smart security camera
- smart sensors
- smart thermostats
- snake
- Social Engineering.
- software defined radios
-

Arduino Spectrum Visualizer
by Gaurav SarrafA music visualizer works by extracting waveform and/or frequency information from the music and feeding this information through some display rules, which produces what you see on the screen. -
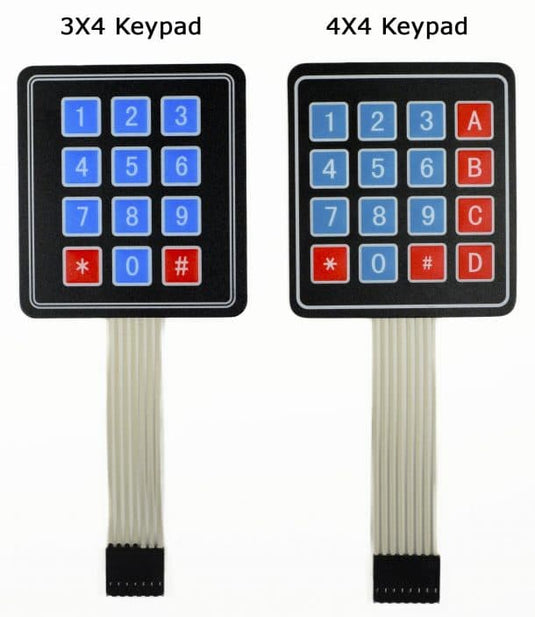
Keypads interfacing with Arduino
by Exto CollaboratorKeypads are a great way to let users interact with your project. You can use them to navigate menus, enter passwords, and control games and robots. In this tutorial, we... -
VU Meter Ring
by Exto CollaboratorWe all love good music. It puts our mood right and helps us relax. A VU meter indicates the intensity of the music with LEDs.A VU meter is an abbreviation... -
Ultrasonic sensor interfacing with output display on 8x32 LED Matrix
by Exto CollaboratorThe HCSR04 ultrasonic sensor can sense the distance between itself and the object in front of it. It uses the formula d=(v*t)/2 to calculate the distance. We can display the... -
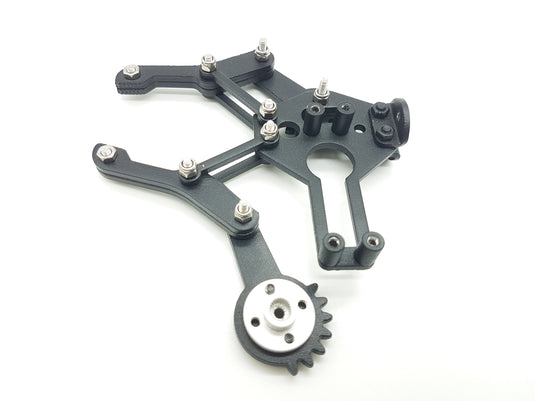
Six Degrees of Freedom Manipulator Robotic Arm
by Exto CollaboratorComponents Required: DIY Kit Arduino Uno Breadboard Power Supply Jumpers Software Required: Arduino IDE Step Wise Assemble: Manipulators can have multiple installation methods. The modules provided have very strong versatility... -
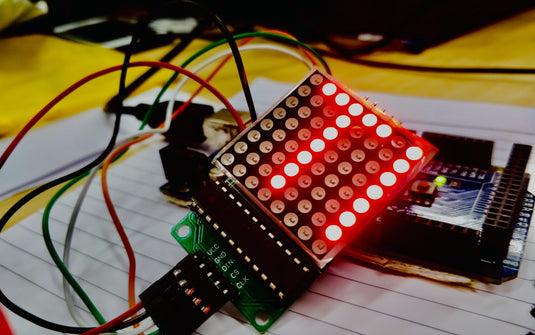
Interfacing an 8x8 Matrix with Arduino, using MAX7219
by Exto CollaboratorWhen combined together in a symmetric manner, multiple LEDs can be used to display messages or patterns which look very aesthetic. Commonly, LEDs are arranged in the pattern of a... -
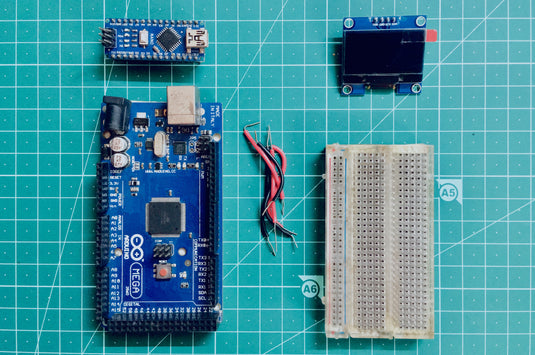
Interfacing a 128*64 OLED display with Arduino
by Exto CollaboratorThis tutorial is about interfacing an OLED display with Arduino. OLED (Organic Light Emitting Diode) displays are made by placing a series of thin organic films between two conductors. When... -
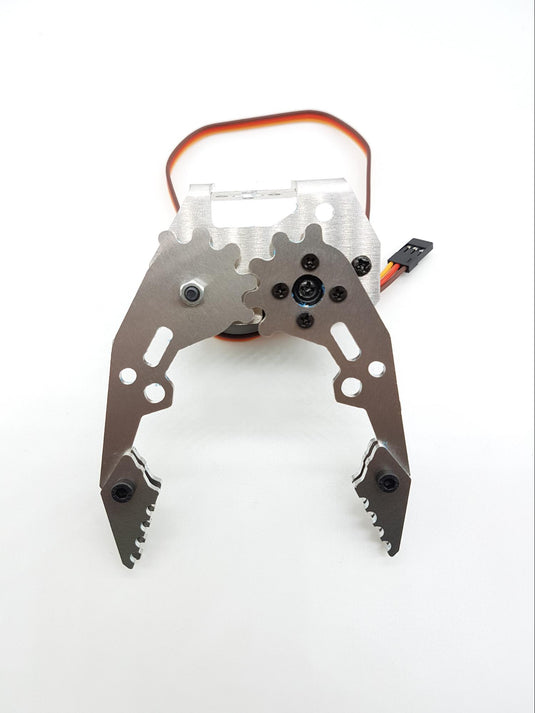
Mechanical Claw for Robot Arm with MG996R Servo
by Exto CollaboratorIn this tutorial, we will learn how to make a mechanical claw for your robotic arm. We are using the MG99R metal servo, to control the claw, which is perfect... -
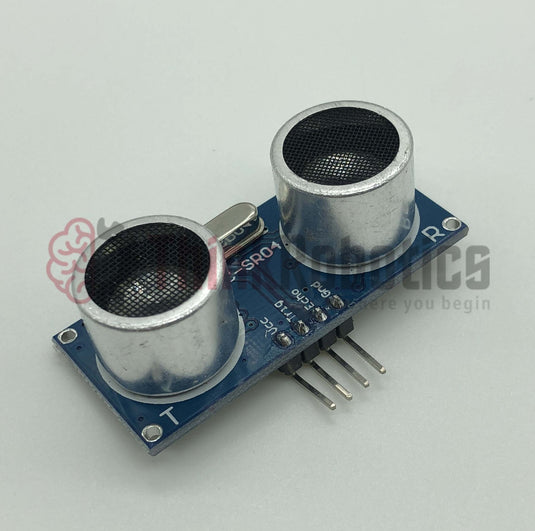
Ultrasonic Distance Sensor
by Exto CollaboratorComponents Required: Raspberry Pi 3 B+ SD Card Micro USB Cable with Adapter Monitor with HDMI cable Mouse and Keyboard Breadboard 4 Jumpers 2 , 330ohm resistors Ultrasonic Distance Sensor... -
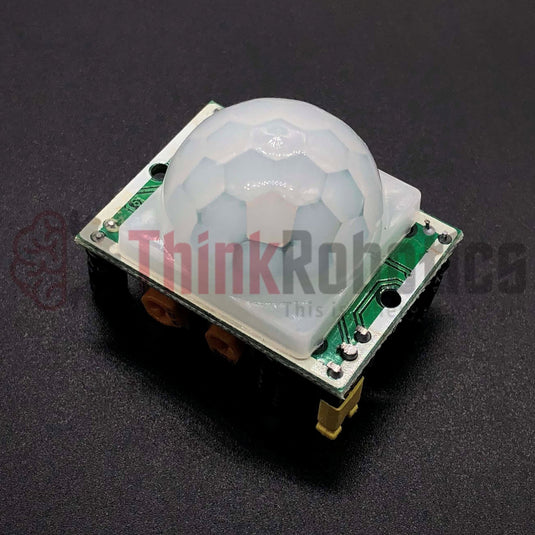
PIR Person Detector
by Exto CollaboratorThe right potentiometer controls sensitivity and the left potentiometer controls the timeout.
Here, we set both the sensitivity and timeout at their lowest (anti-clockwise). It is advised to keep the timeout as low as possible and just change the sensitivity depending on the range required.
Popular Links
Arduino, Andostar, 3DXTech, Asus, Bondtech, Dewo Motors, E-Sun, Elephant Robotics, Flux, Fysetc, GenAce, HiWonder, Magigoo, NVIDIA, Raspberry Pi, SEEED Studio, Slice Engineering, Tattu Batteries, Waveshare, Yahboom, Yihua, Forecr, Slamtec, Luckfox, YDLidar, Orbbec, Arducam, Cricut, Uno, Mega, Protenta, MKR, Digital Microscope, Carbon Fiber Filament, 3D Printer Parts, Motors, 3D Printing Filament, Robotic Arm, Laser Cutter, 3D Printers, Robotics, 3D Printer Glue, Jetson, AI GPU, Raspberry, Edu Robotics, Soldering Machines, NVIDIA Kits, Lidars, 3D Cameras, Nvidia Jetson Accessories, Nvidia Jetson Robotics, Arduino Shields, Raspberry Pi Accessories, Storage Modules, Cables, Cameras, Laser Modules, Thermal Cameras, Drone Frames, Drone Controllers, ESP, LoRA, WiFi Module, Bluetooth Module, GPS & GSM, Batteries, Battery Charger, Breakout boards, LCD Displays, Displays, Motors & Drivers, Power Modules, Power Supply, Sensors, Screws & Nuts, Washers, Actuators, Gears, USB Multimeters, Allen Keys, Electrical Measurement Tools, Raspberry Pi 5, Raspberry Pi 4, Raspberry Pi ZW, Raspberry Pi Z2, Jetson Nano, Jetson Orin, Jetson NX, Jetson Carrier Boards, Jetson AGX


